THAAAAAAAAAAANKYOUUUUUUUUUUUUUUUU MEGAN!! So thrilled to be here :)
Being a make-up artist, I regularly get asked the question: “How do you do a smokey eye?”
There are numerous ways to create this look, and I have found that some girls panic as to whether they are doing it the “right” way. I am here to tell you there is no “right” way. No rules. No make-up bible that you have to swear by. Make-up is about having fun and experimenting. There are only guidelines, and then the rest is down to you. On that note, I thought I would take this opportunity to talk you through this timeless look, by showing you a step by step tutorial. Simple guidelines – no rules allowed ;)
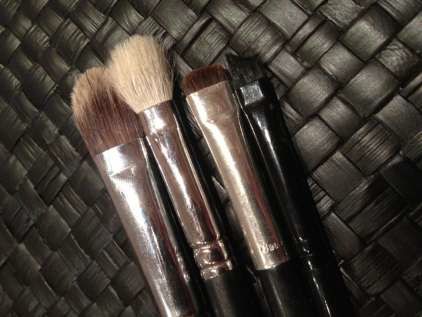
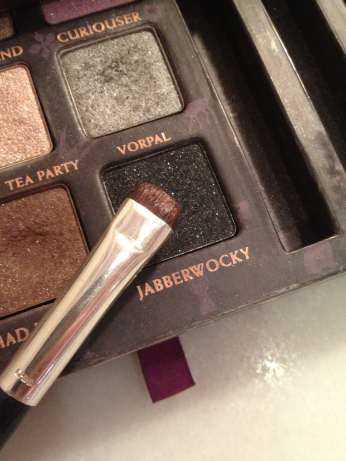
Caption (Shu Uemura Shader, M.A.C 217 Blending, Nars Smudge Brush, Illamasqua Eyeliner)
OK, you will need a few things for this.
First up, brushes! Good brushes definitely help, they will become your new best friends. In this tutorial you will need a brush to apply the shadow, one for blending, an eyeliner brush and a “smudge” brush for more accurate application. If you cannot get your hands on all of these, do not worry – most eyeshadow brushes are really versatile so just find what works best for you. I even used my finger tips for part of this tutorial!
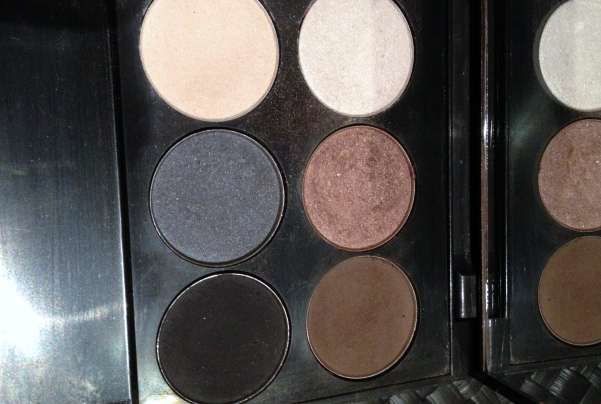

Onto make-up. Think of a smokey eye as three colours. Dark, medium light. There are many palettes now on the highstreet or in beauty halls to choose from that have ready made “smokey eye” palettes containing these three shades. If you have one of these feel free to use it. In this tutorial, I am using a selection that I just love to work with. I decided to grab from my kit:
Jemma Kidd Make-up School – Essential Smokey eye kit - “Light”
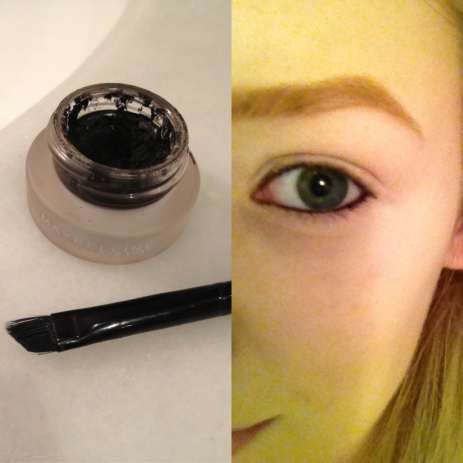
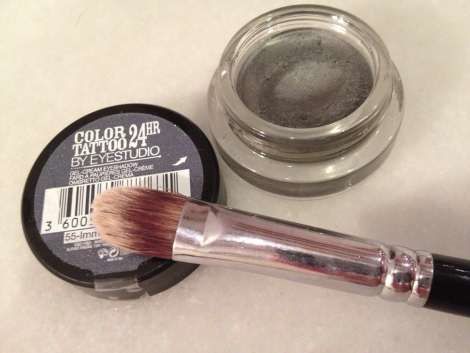
Maybelline Colour 24hr Tattoo in Immortal Charcoal – “Medium”
Urban Decay Alice and Wonderland Ltd Palette - Jabberwocky – “Dark”
I could have just gone ahead and use the Smokey Eye Kit, but instead decided just to use the lighter shades in the palette for this guide. You can use whatever you like, just remember the guidelines for a Classic Smokey Eye are greys and blacks, and select three colours in a range of dark to light. You also need mascara, a selection of dark eyeliners and you may like me choose to use an eye primer.
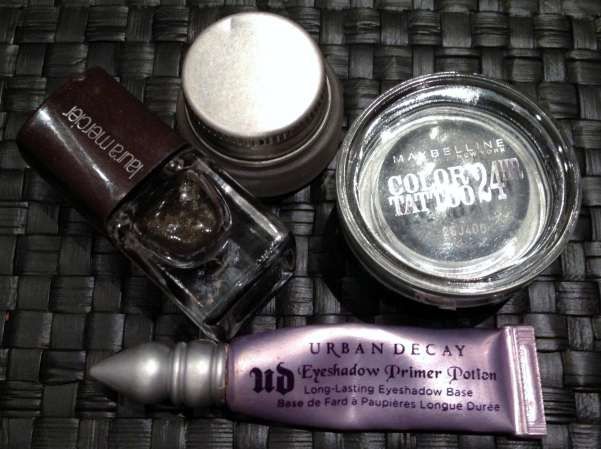
I used:
Urban Decay Eyeshadow Primer Potion in Original
Laura Mercier Onyx Brilliant Gel Liner
Maybelline Eye Studio Lasting Drama Gel Liner
A Clinique Mascara
Step One:
Apologies for the naked face, but you need a blank canvas. Yes, that is right we are doing the eyes first. Why? If you make a mistake, or eye shadow powder falls onto your base it will look messy and be difficult to fix, so start your eyes first and then do your base. Apply eye primer and here I also like to fill in my brows.
Next, take your black liner (pencil or gel – personal preference) and then line the inside of your eyes, both the top and bottom water line. This will really make your eyes pop.
Step Two
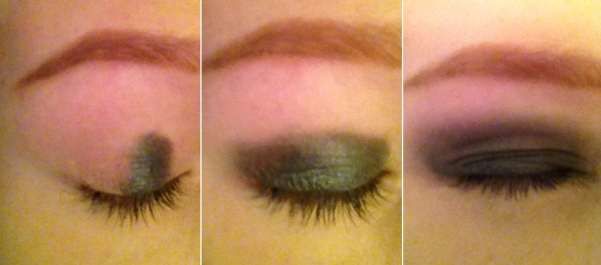
Apply your medium shade to your lid. I used the Maybelline Colour Tattoo here, applying it all over the lid with the flat shader brush. Build up the colour to create depth. Take your blending brush, and going backwards and forwards along the crease really buff the colour into your socket line. If you are using this cream eyeshadow, I suggest you work with the product quickly as I find it sets really fast. Keep blending and blending along the crease, into your socket and slightly below your brow bone.
Do this until you are happy and there is no “line”. A soft finish is much better than having a harsh line.
Take this colour under your water line, use a cotton bud to neaten up any edges when you do this, as you may find the line you create is too thick.
Step Three
Time for some definition. Take your dark shade, preferably a black, or like mine one with a little bit of glitter in. Apply with a smaller brush, as suggested a “smudge” brush and tap off excess powder or apply to your hand first. This is important as you do not want to make a black mess.
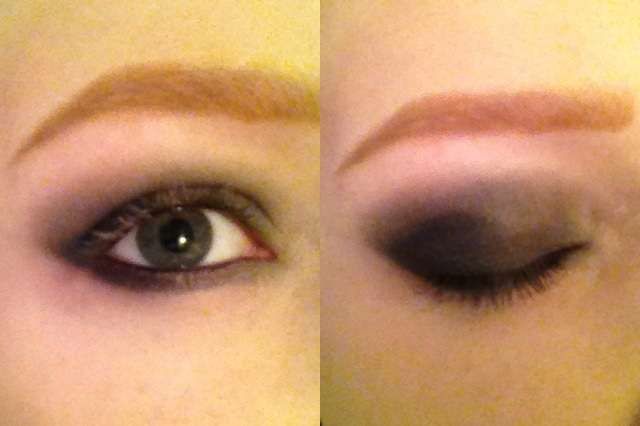
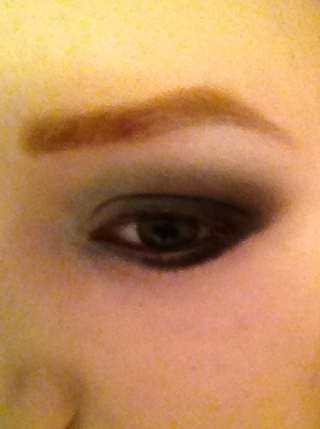
Use the dark shade to create this V shape. On the top of your lid start from the outer corner of the crease and sweep towards the centre then stop. Then, still on top of your lid go from the outer corner of the lash line and line the top of your lashes, stopping just before the centre. Blend the dark and the medium together here slightly. You will also need to line underneath the lower lash line with this dark shade – use the picture above as your guide.
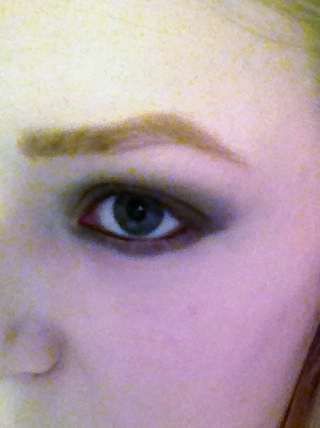
Hopefully, you can now see your Classic Smokey Eye coming together.

Use the above picture here for a guideline, this is how your eyes should be looking. We all have
different shaped eyes so do not panic if the shape is not the same, but you get the idea.
Nearly there ;)
Step Four
Highlighting is next. Take your light shade and using a finger or a clean brush dab the lighter shade into the inner corner of your eye and sweep along the brow bone. I like to blend the edges together too.
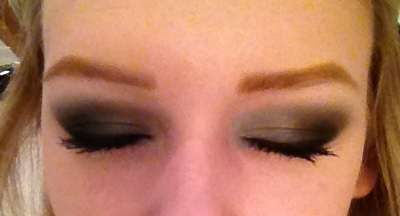
Ok, we are at the final stage now guys! Using the same liner as before, or like me, choose a slightly different shade – I chose one with more shimmer – line the top lash line. Give yourself a flick or just keep it simple, all we are doing is adding that tiny bit more definition. Give your lashes a good curl and wack on lots of your favourite black mascara.

Are you happy? If so clean up any mess with a cotton bud and then apply the rest of your base, contour and lip as normal.
That is it! Follow these guidelines, practice and do not be afraid to blend!
I truly hoped this post has helped you guys. If you have any questions, or would like to see more posts like this then please get in touch.
Zoe xx
http://www.zoenewlove.com/
Zoe xx
http://www.zoenewlove.com/


No comments:
Post a Comment